oneMetrix Portal Overview
This document provides information on how to configure the oneMetrix security, user, and administration features.
oneMetrix Introduction
oneMetrix is the web portal used to access all of the cloud data pertaining to POS operations. This includes user admin setup information, POS data objects and reporting, and the in-house solutions for payment providers, such as gift cards and loyalty. All of the functionality related to accessing location information can be performed in oneMetrix. Ordering software and viewing location information in the Dealer Portal, multi-unit access, creating gift card ranges, and viewing various reports can all be executing using oneMetrix.
Initially when a new site is ordered, oneMetrix is automatically activated for it as well. (Please see the Dealer Portal section for further instructions on how to retrieve this information). This document will cover how to navigate through oneMetrix, how to perform User/Admin tasks, and how to update the general settings of oneMetrix.
oneMetrix Navigation
To begin, log in to oneMetrix with either your dealer credentials, or the credentials of the site that you would like to view. Enter the Serial Number, your user name and password and click Log In. Once logged in, you can select all of the applicable sections in which you have access. (Please see each individual KB for further instructions on each menu option).
Dashboard
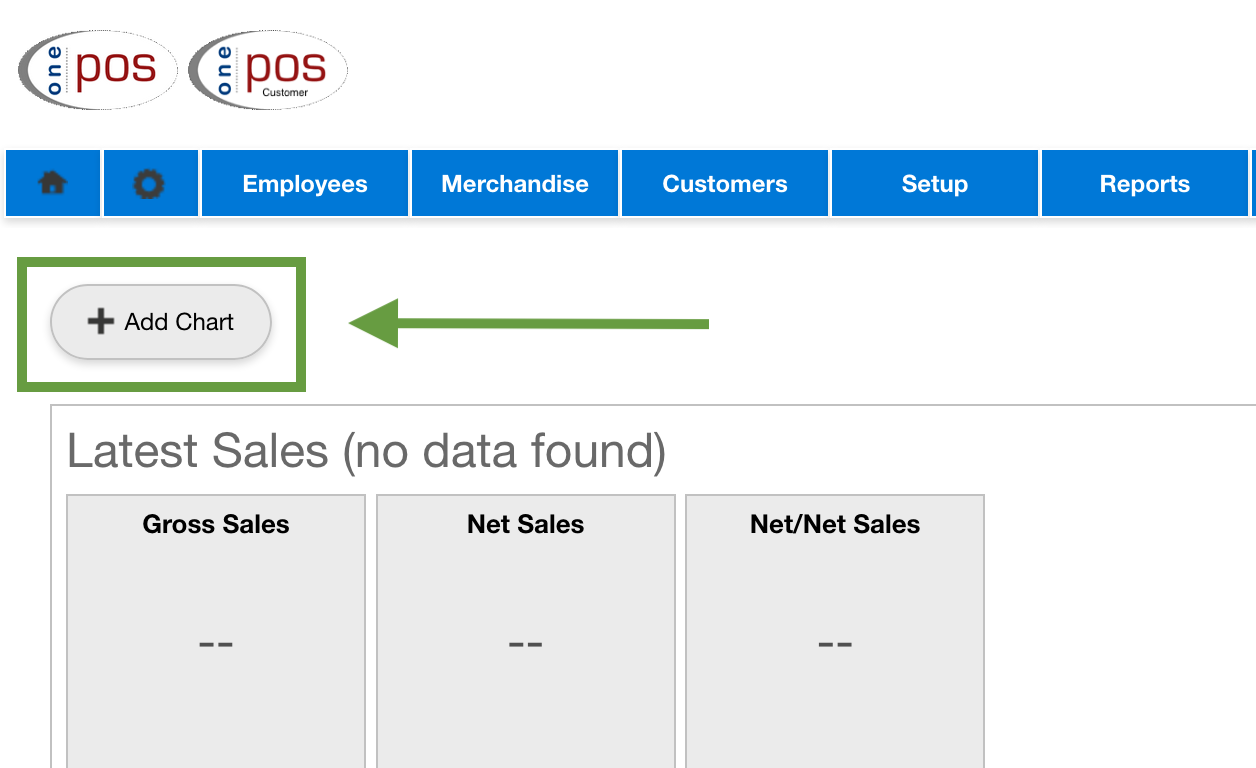
Once logged into oneMetrix, a home page will appear showing at minimal a Sales Summary grid displaying the current sales of the location. You can customize this page by adding charts to your home page. Click the Add Chart button to add a new chart to your dashboard.
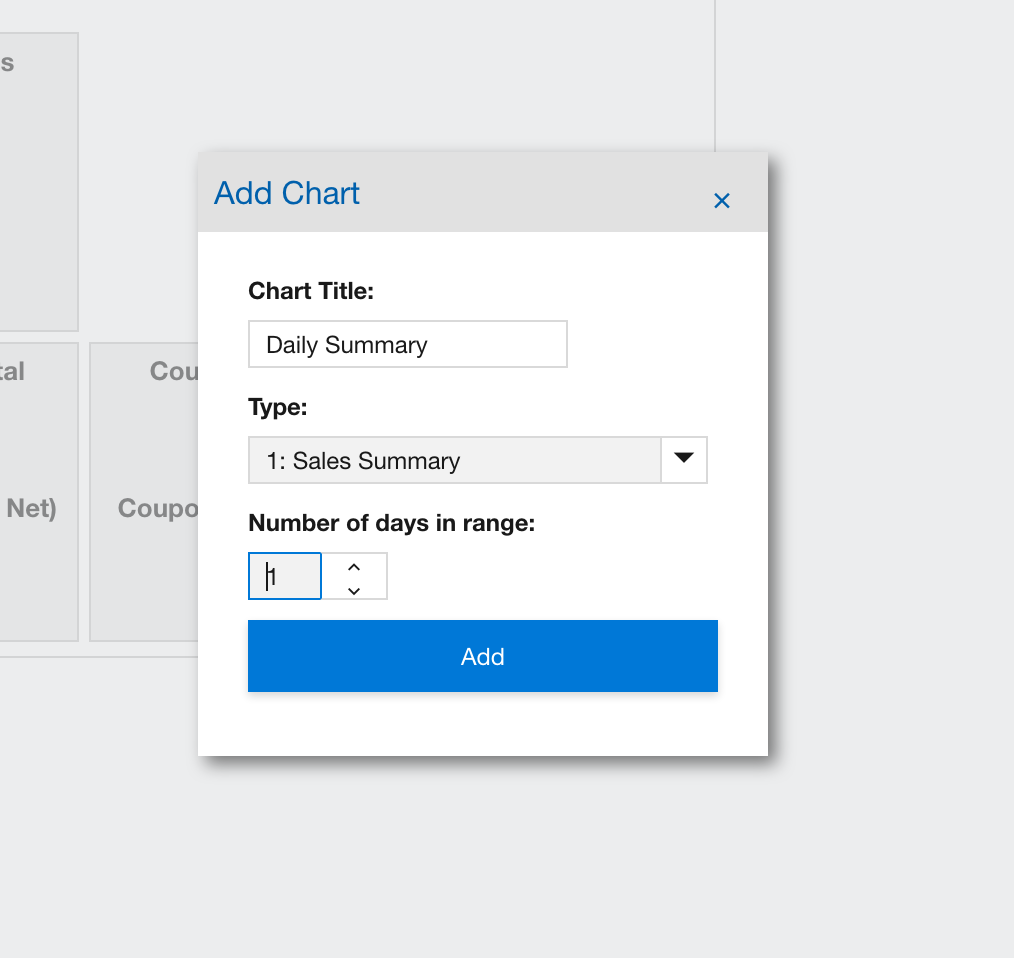
Enter a title for the chart, then select a type and the number of days to display. There are three types of charts you can select: Sales Summary (shows the summary of the sales including reductions), Department Sales (shows each department sales breakdown), and Category Sales (shows each categorical sales breakdown).
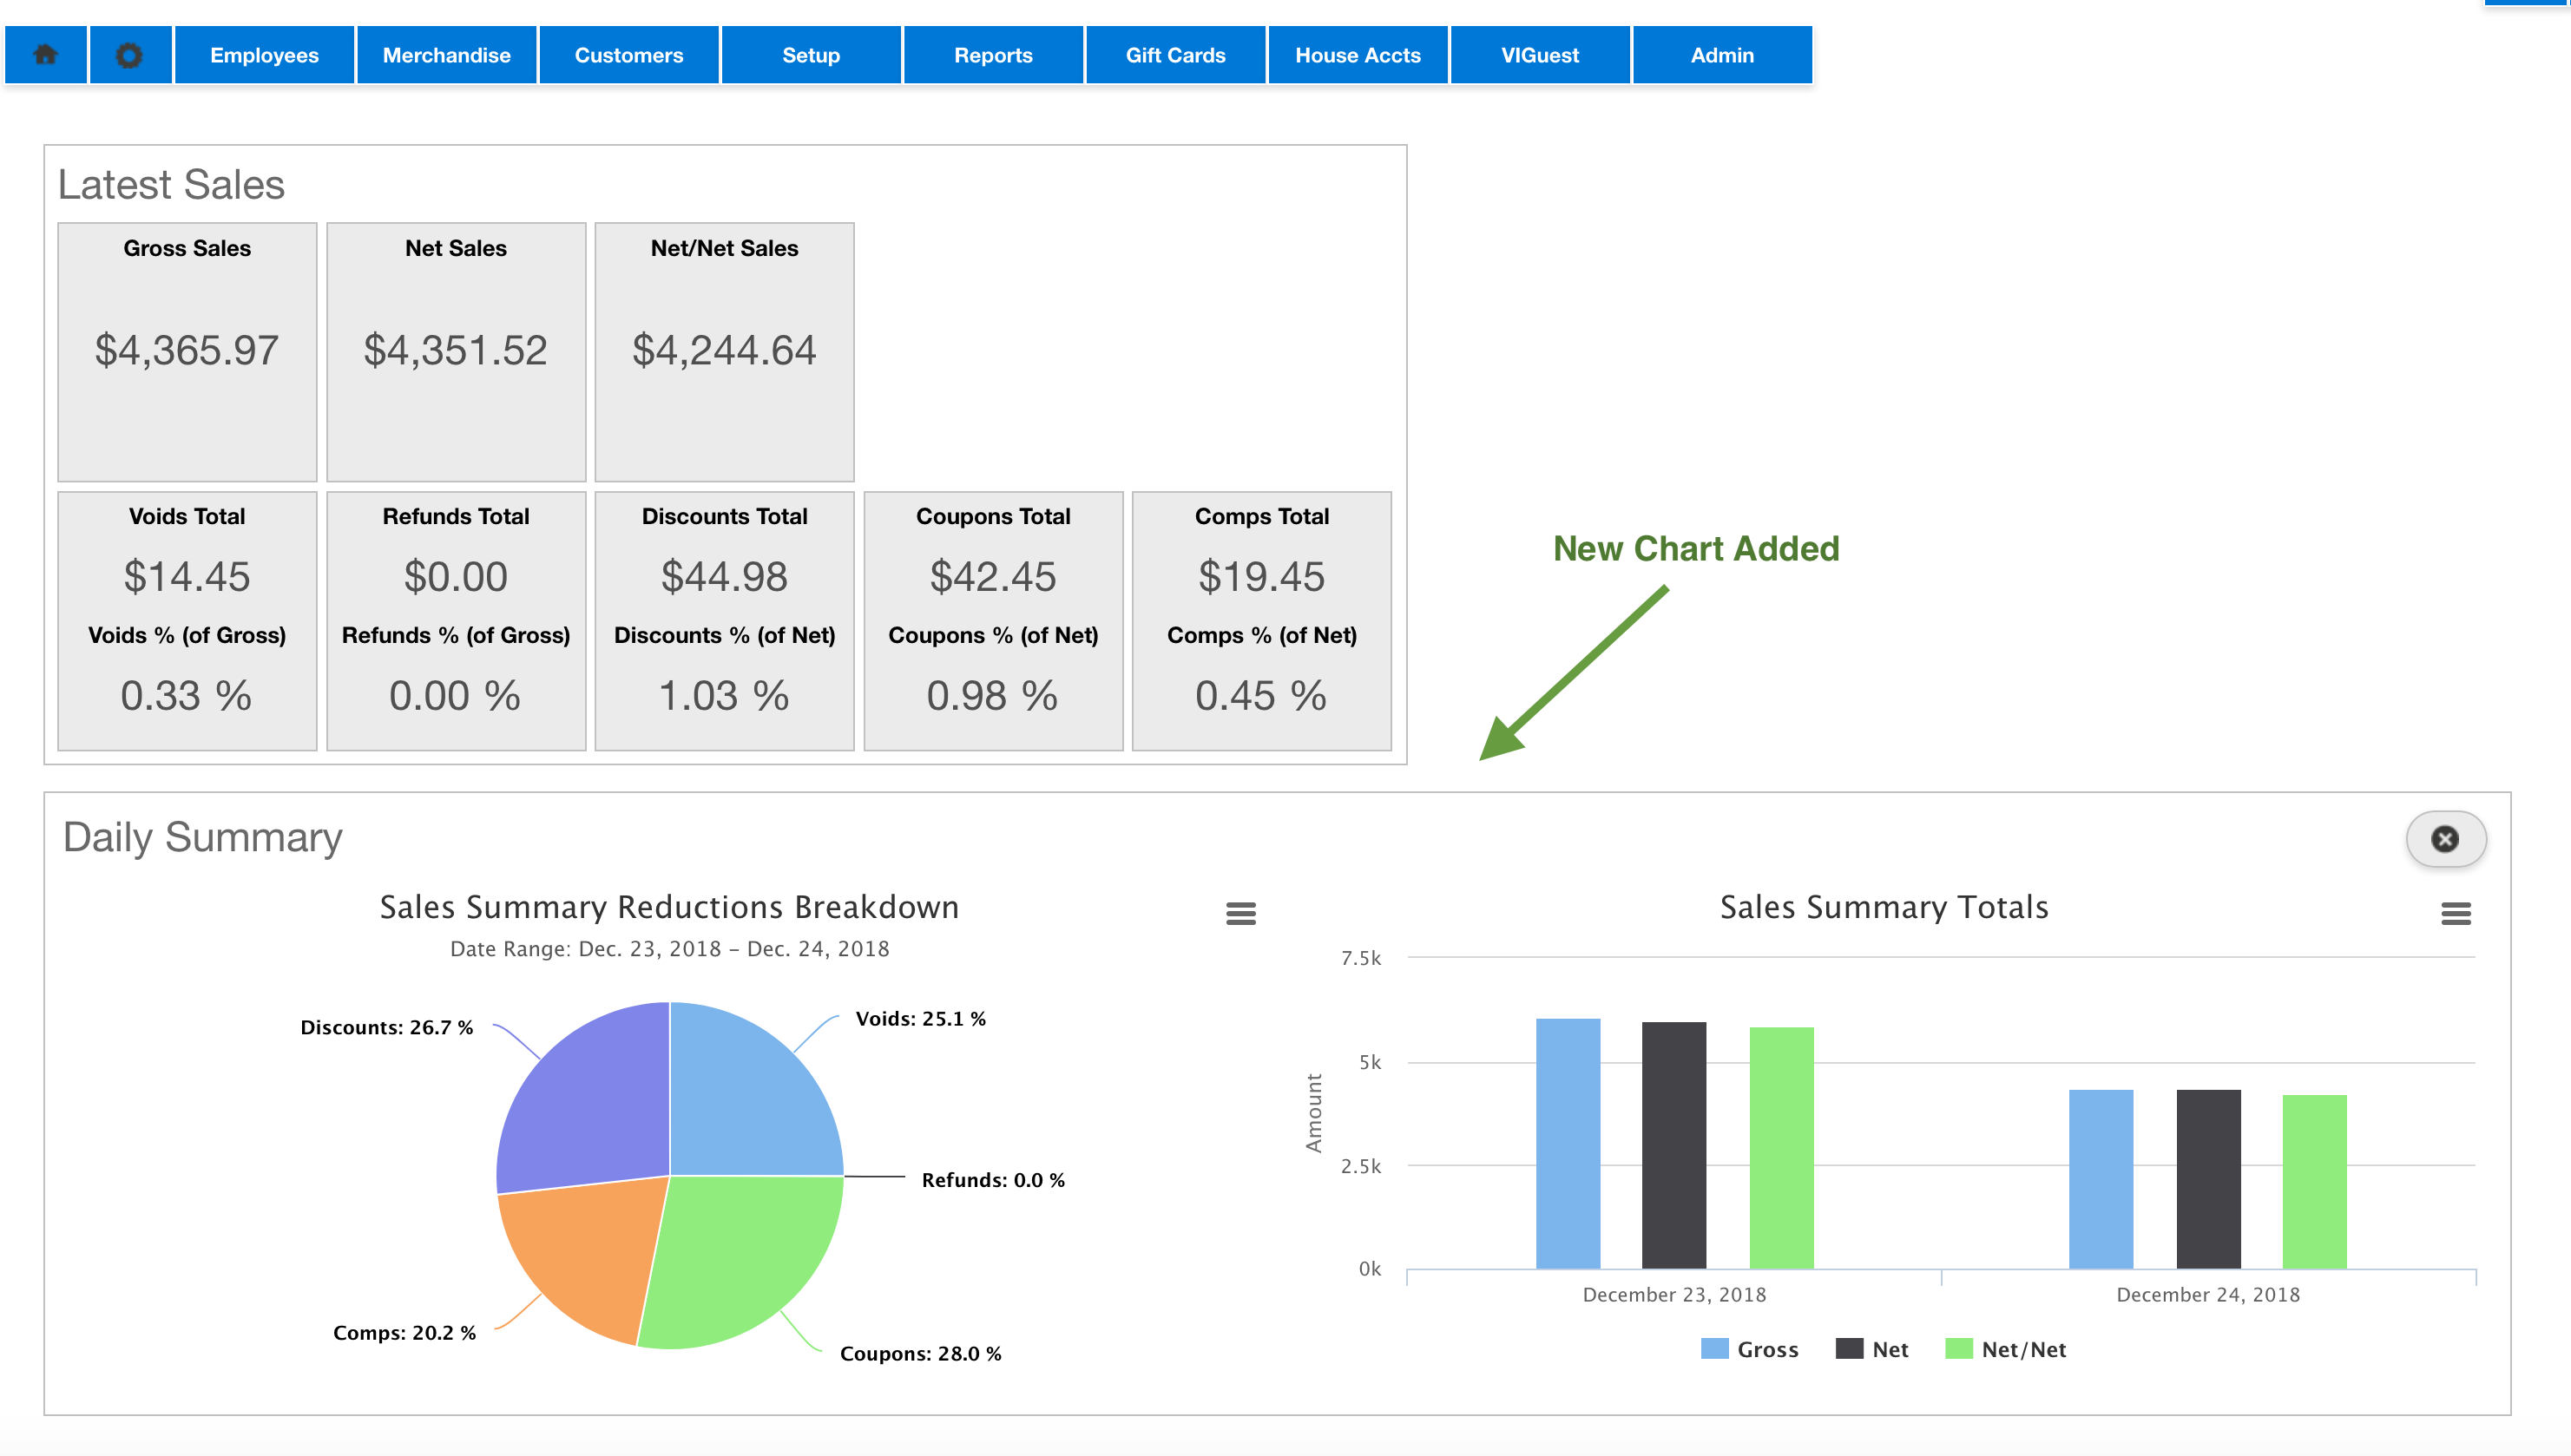
Click Add to add the chart, and then the chart will be displayed below the Sales Summary grid.
User Admin
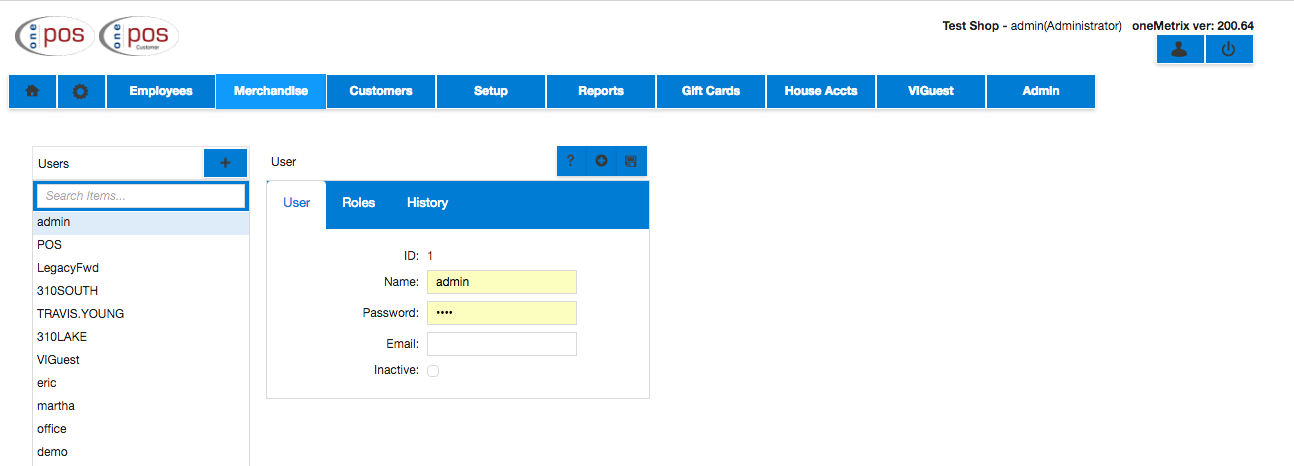
To begin using the onemetrix functionality including Gift Cards, House Accounts, Loyalty, and Above Store, log on to onemetrix.com using either the login as function in the Dealer Portal, or by entering the User Name: admin and Password: . Select the Administrator role and select User Admin at the top of the screen. Select the Users tab on the tree to the left, and select the admin user in the list.
Changing the admin password
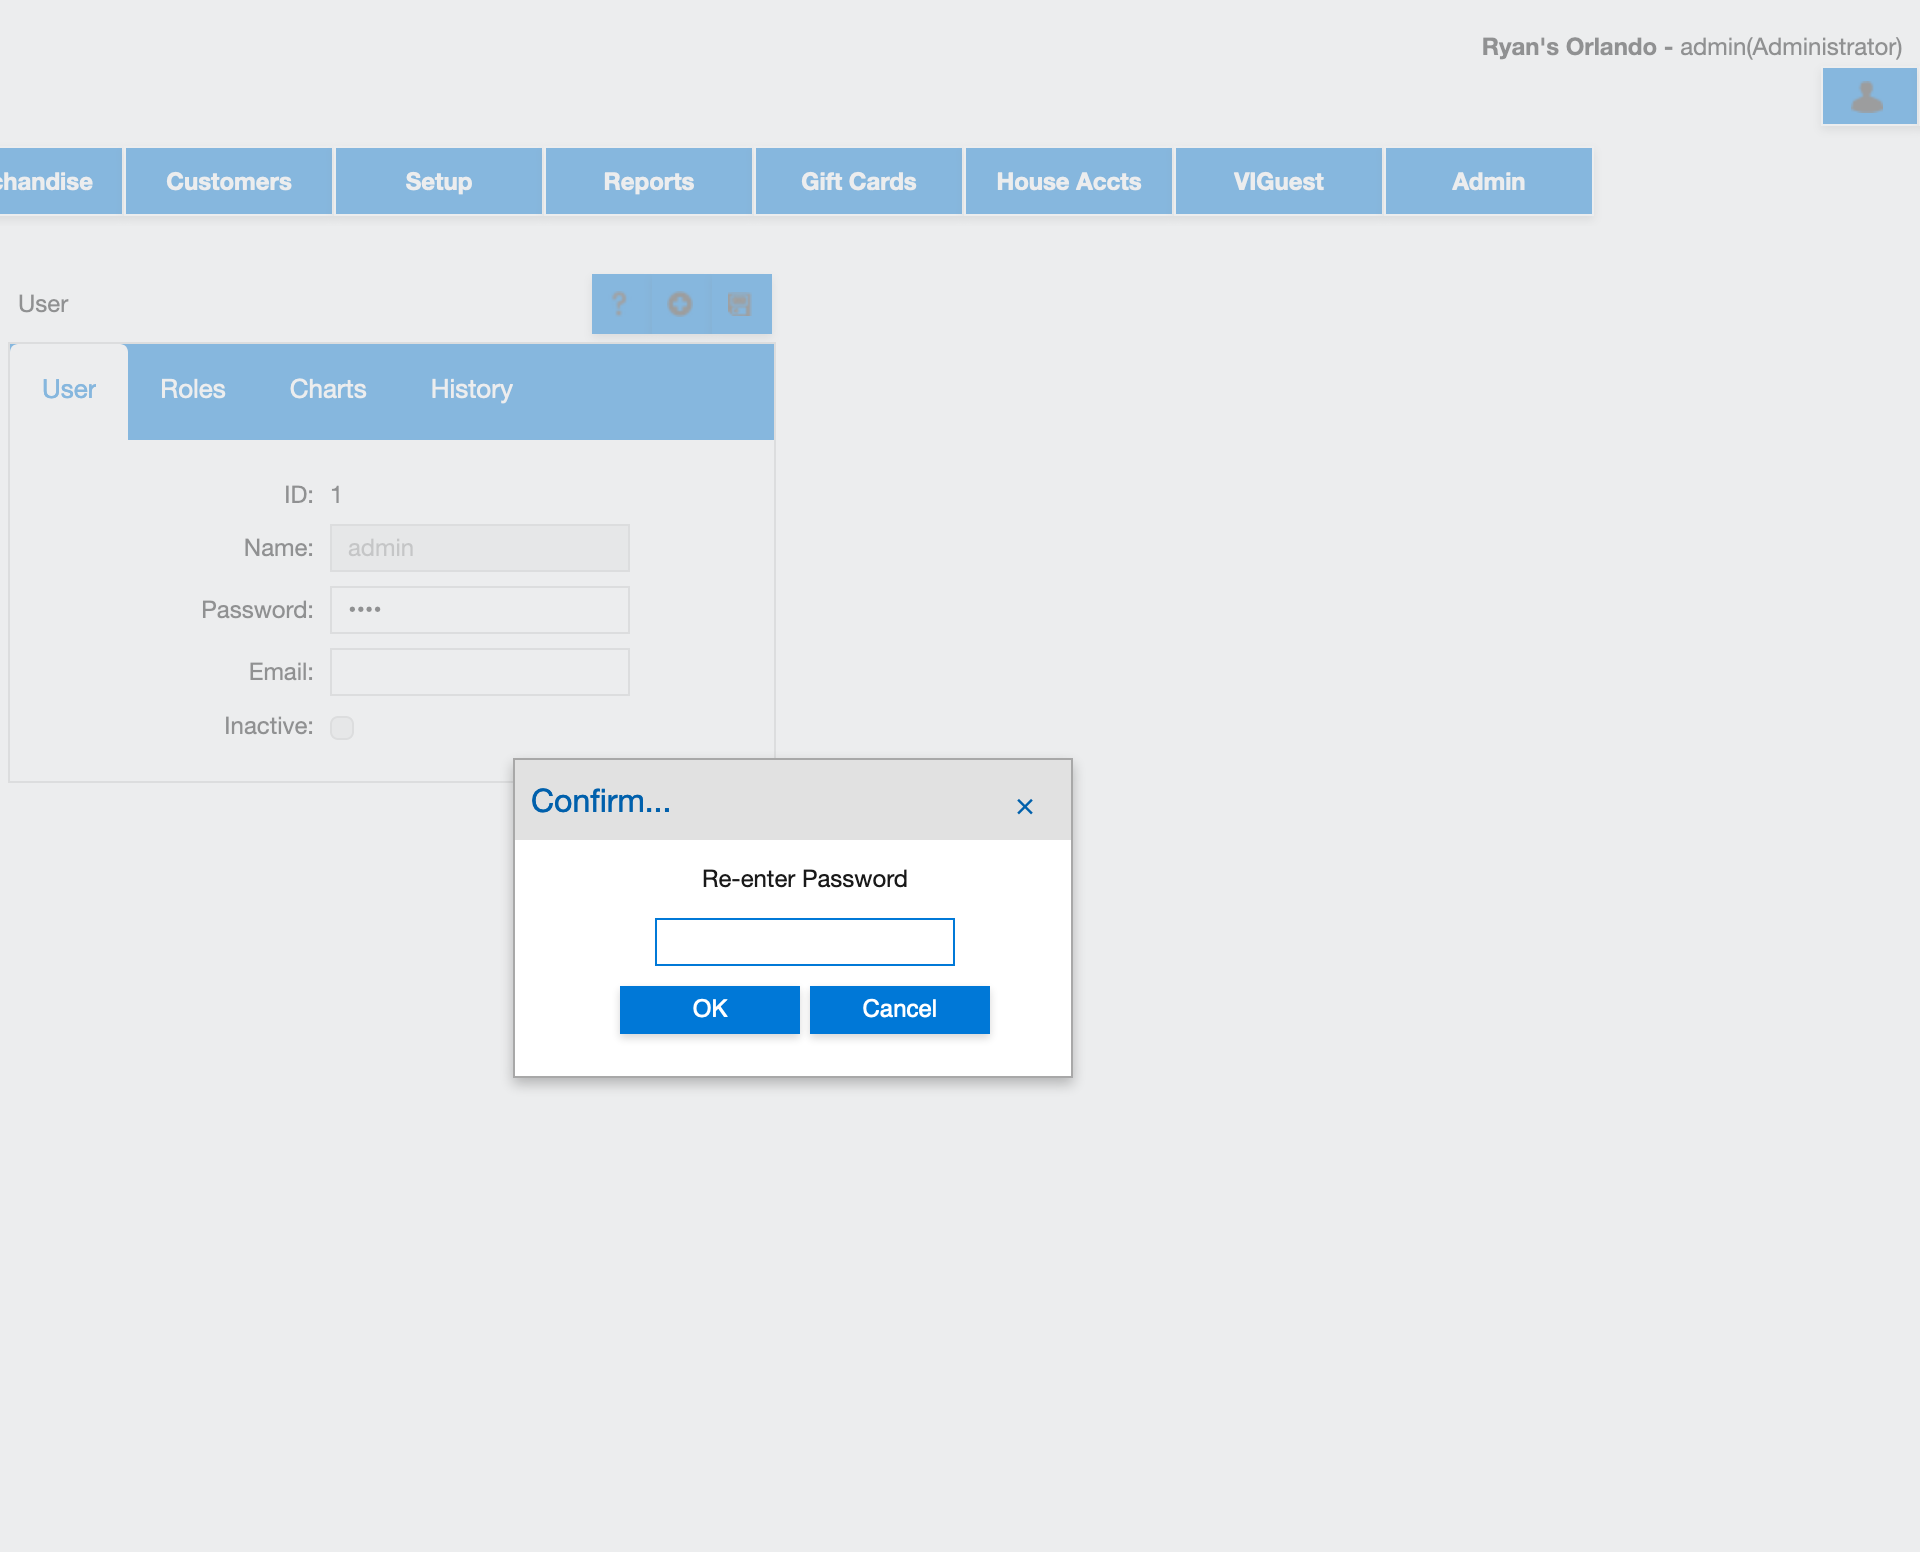
You may update the admin password by entering a new password on the panel, then clicking Save. oneMetrix will ask to confirm the password, and also confirm that they match. The system will log you out if you are logged in as the admin user.
Creating a new user
Go back the User Admin section of the website. Click the Users option on the tree to the left. Click the Add button on the Users list.
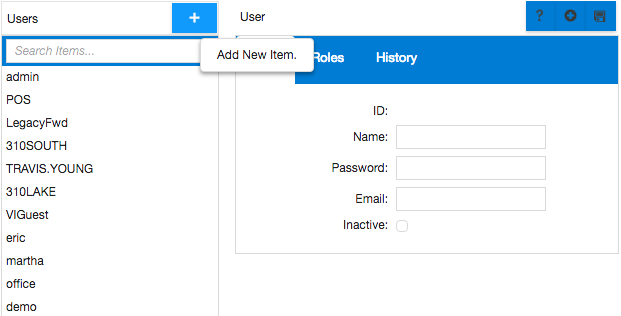
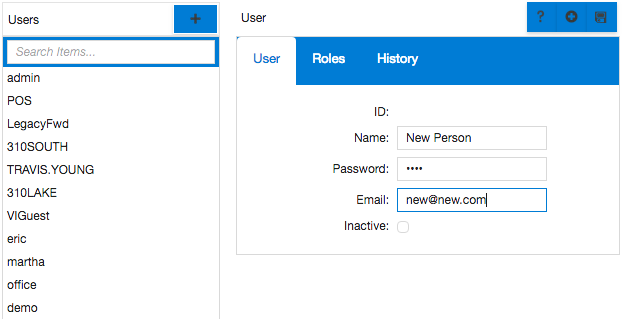
In the panel, enter the user name and password. If you want to inactivate the user check Inactive. To create an active user, leave the Inactive option unchecked. Click Save at the top of the panel to add the user.
Creating a new role
Click the Roles option on the left side of the tree, and select the Add button on the list (like performed when adding a new user). Enter the name of the role, and click Save when complete.

Adding/removing roles to users
There are two ways to add/remove roles to existing users.
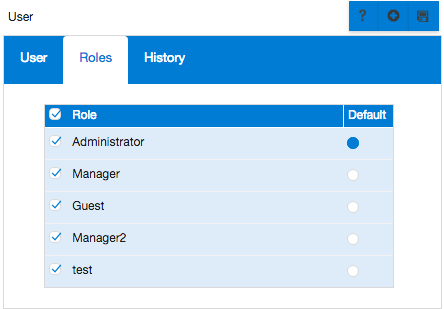
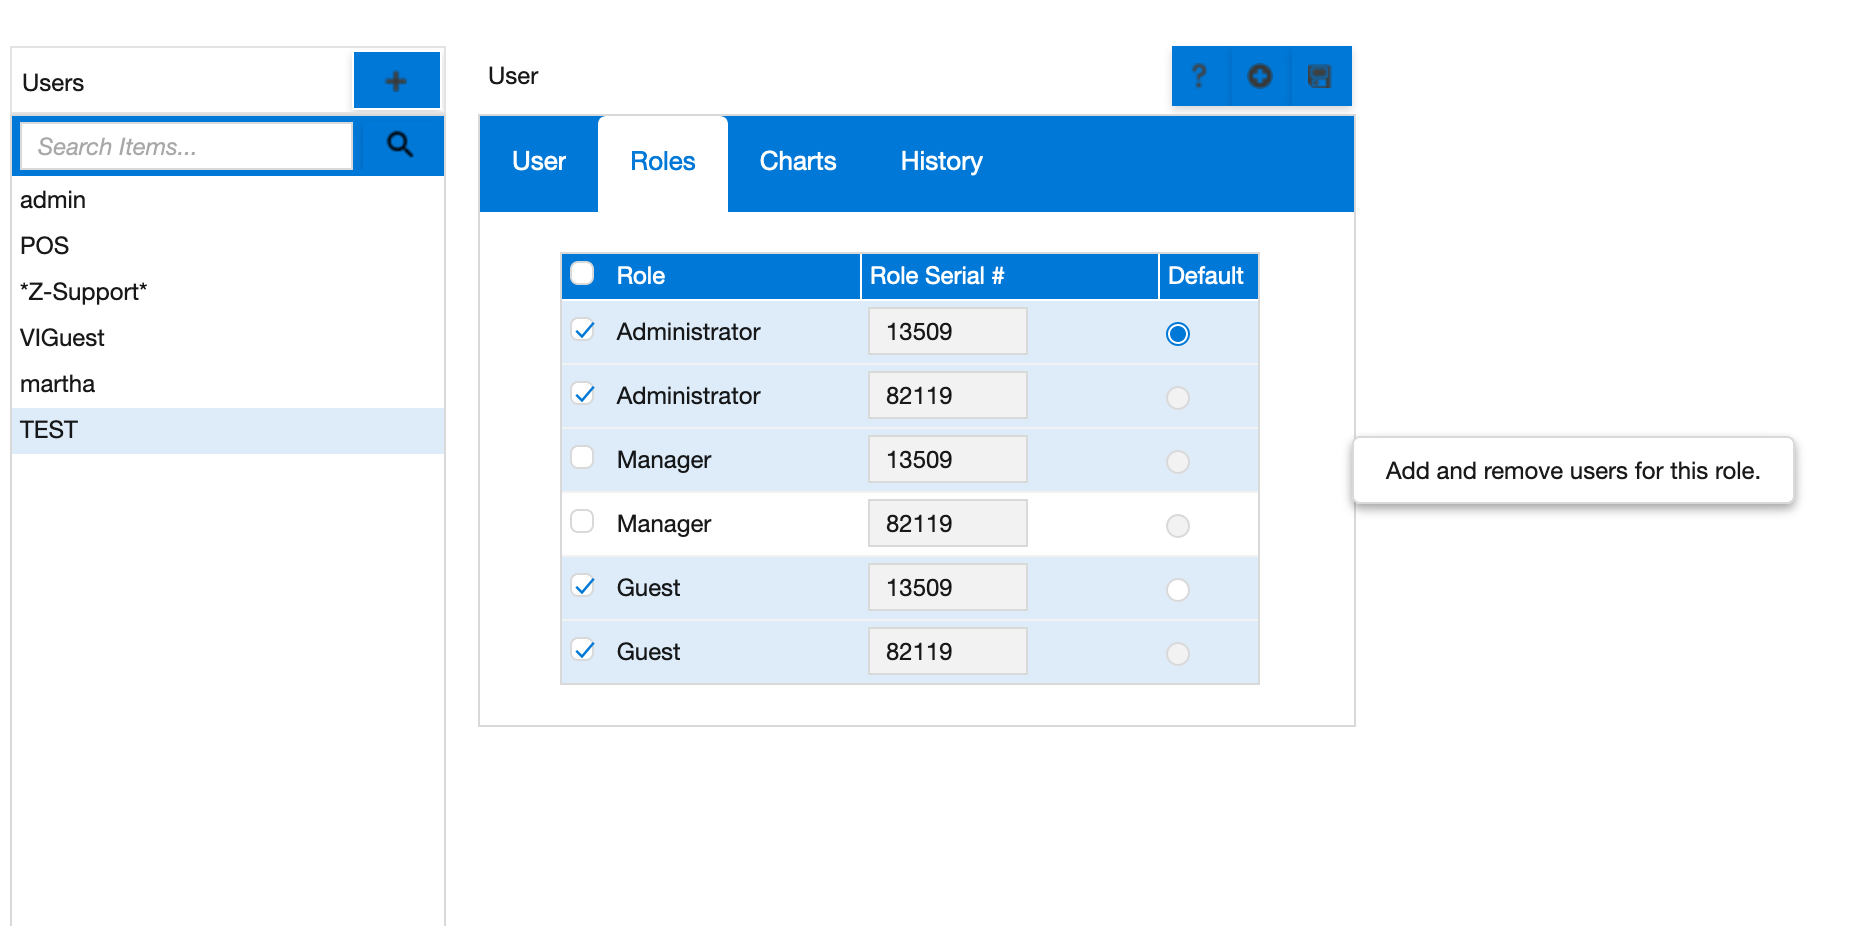
a. Users Option: Click the Users on the tree to the left, select the
user, then select the Roles tab. Check/uncheck the roles to add/remove
roles for the user. Click Save when finished.
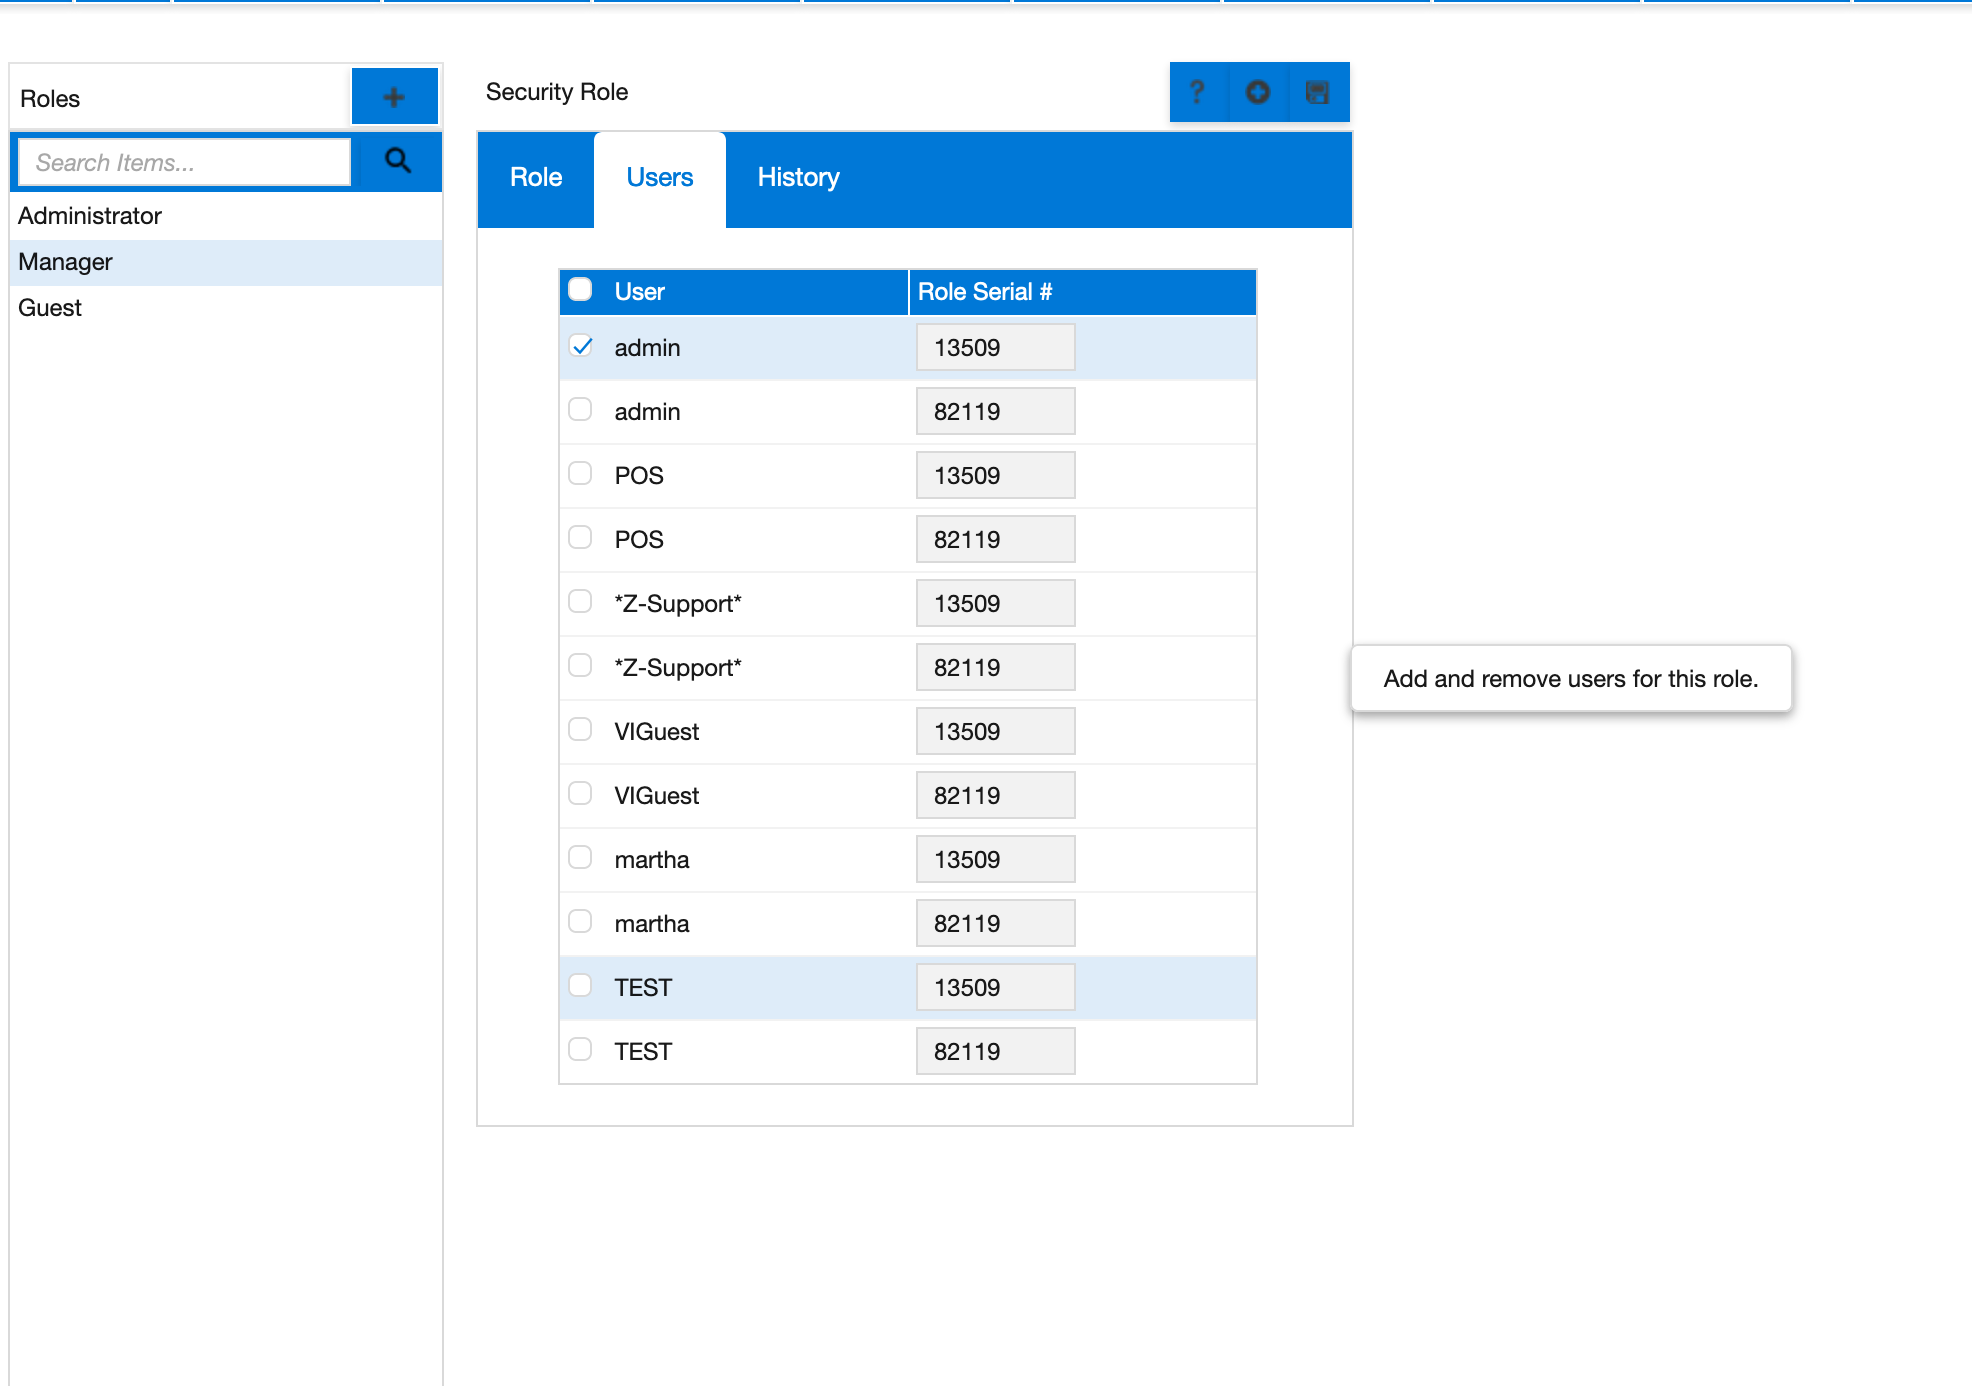
b. Roles Option: Click the Roles on the tree to the left, select the role, then select the Users tab. Check/uncheck the users to add/remove users for the role. Click Save when finished.
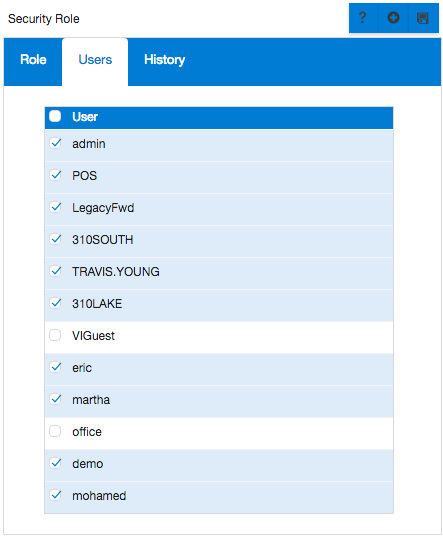
You can also change the default security role for users that have more than one role. This is the role in which the user is automatically logged into oneMetrix.
c. Multi-Site Roles
For sites belonging to a group, roles for the group serial number can be
configured for each site within the group. These roles allow users to
access the Gift Card, House Account and Loyalty functionality of the
system. Adding and removing a user’s group role for a certain serial
number can be toggled on/off, and then saved.
Adding/removing Permissions for Roles
There are also two options for obtaining the security role details
for each role: by permission and by role. The details show which
database tables and the specified security options that belong to the
role.
a. Permission
Select Role Details by Permission on the tree. Select the table or
permission value for which you wish to add a role. Click Add on the list
of Roles. Select the Role, the Table/ Permission and the Level of
access. Again, to inactivate the role, check Inactive. If this is a new
active role, leave unchecked. Click Save when complete.
b. Role
Select Role Details by Role on the tree. Select the role for which you
wish to add a table or permission. Click Add on the list of Permissions.
Select the Role, the Table/ Permission and the Level of access. Again,
to inactivate the role, check Inactive. If this is a new active role,
leave unchecked. Click Save when complete.
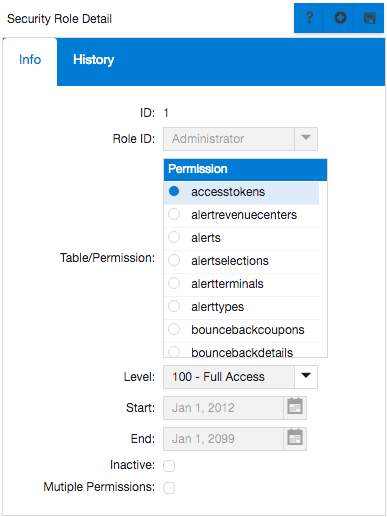
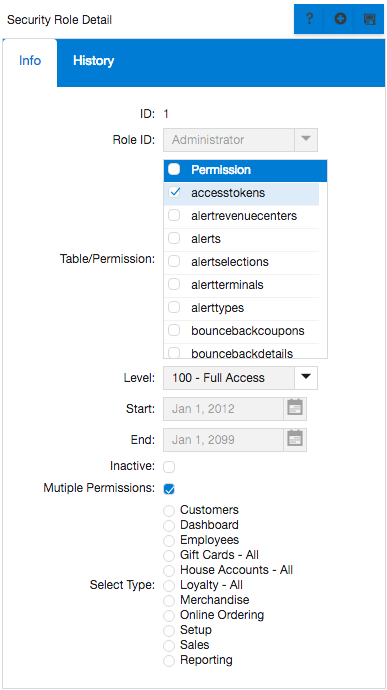
c. Multiple Permissions
You can add multiple permissions for a Role/User. When you select a
Security Role Detail, check Multiple Permissions, and you can multiple
permissions to add to the role when you save it. In addition to this,
you can select a Type of permissions to add to the Role Detail, such as
Gift Card, House Account and Loyalty, Online Ordering, Employees, etc.
Simply select the option you want to activate, and Save.
d. Enterprise Permissions
For sites using enterprise, the Gift Card, House Account, and Loyalty
permissions are defined at the enterprise (or group) level. Therefore,
for sites that belong to a multi-unit, make sure you log in as the group
serial number to set the permission level access.
Permissions/Preferences Specifications
Security Role Detail Permissions are accessible through Role Details by Permission and Role Details by Role. Under the Permission list, the permission names specified in lower-case reference table names located in the onemetrix database. For example, the comps permission references the table contains all of the Comps for each site set up on Above Store. The table names preceded by ‘sales.’ reference the above store sales tables. Each table name describes the type of data that resides in the database. All permissions in upper-case reference specific functionality that can be executed in the onemetrix system. For instance, the Gift Card Activity Report permission indicates that the user may access this specific report. These permission names are quite self- explanatory. Note: If you are unable to view an item in onemetrix, make sure that the corresponding permission name for the item is set to an accessible level for the role.
Preferences
There are various system-wide preferences that can be configured on
onemetrix in User Admin->Preferences. There are non-editable
properties for Gift Card, House Account Card and Loyalty Card. These are
created when software is initially ordered for a site, and they are
referenced when performing manual-entry card transactions. The following
are editable preferences. For more detail regarding use of these
preferences, consult the applicable document.
Loyalty Auto Tag: When true and new loyalty accounts are added, auto-assign the next available virtual card number to the account. (Note: If the location is multi-unit, log in as the group to set this preference).
Online Ordering Image Path: For Online Ordering, path to where the CSS and image files are placed.
Online Ordering CSS File: The CSS file that the Online Ordering application uses to determine the look and feel for the site’s online ordering page (resides at Image Path). Online Order Prep Time: A variable that can temporarily/permanently override the prep time defined in the Online Ordering CSS File.
Online Ordering Email: Email address where an email notification is sent when an online order is placed at the store.
Schedule Source: For scheduling, this can either be set to onePOS or Hot Schedule. Schedule Start of the Week: The day of the week the schedule starts (only for when Schedule Source is set to onePOS).
Hot Schedule Username: If schedule source is Hot Schedule, the Username.
Hot Schedule Password: If schedule source is Hot Schedule, the Password. Hot Schedule Concept: If schedule source is Hot Schedule, the Concept. Hot Schedule StoreNum: If schedule source is Hot Schedule, the StoreNum. Hot Schedule Client ID: If schedule source is Hot Schedule, the Client ID.
Hot Schedule Sales Option: Sales value to be sent to Hot Schedule: Net, Gross or Net Net.
Time Zone: The time zone where the site exists.
oneMetrix Logo Path: For the oneMetrix page, any files (i.e. the oneMetrix Logo File) that are configured for onemetrix.com are located at this path.
oneMetrix Logo File: The name of the customer logo file that is located at the top of onemetrix.com (resides at the path above).
(Note: If the location is multi-unit, log in as the group to set the following preferences).
VI Guest Logo Path: For VIGuest Sign Up, the path to where the image logo file exists.
VI Guest Logo File Name: The name of the image logo file (resides at the path above).
VI Guest Title: A configurable title for the VIGuest Sign Up page.
VI Guest App Home Page: Link to the HTML page containing the landing page for the VI Guest app.
VI Guest App Loyalty Items Title: Title that is shown on the Items screen in the VI Guest app.
VI Guest Title: Title shown on the VI Guest home page/app.
VI Guest Scan Card Prompt: Whether or not to prompt customers signing up
for loyalty to swipe a loyalty card to tag to the guest's account (at
the VI Guest Sign Up page/app).
VI Guest Fields (currently deprecated):
Address (1), VI Guest Address (2), DOB, Anniversary, Home Phone, Work Phone:
Visibility of these fields on the VI Guest sign up page/sign up app: Optional, Hidden, or Mandatory.
Settings
To access oneMetrix settings, click on the gear in the top left corner.
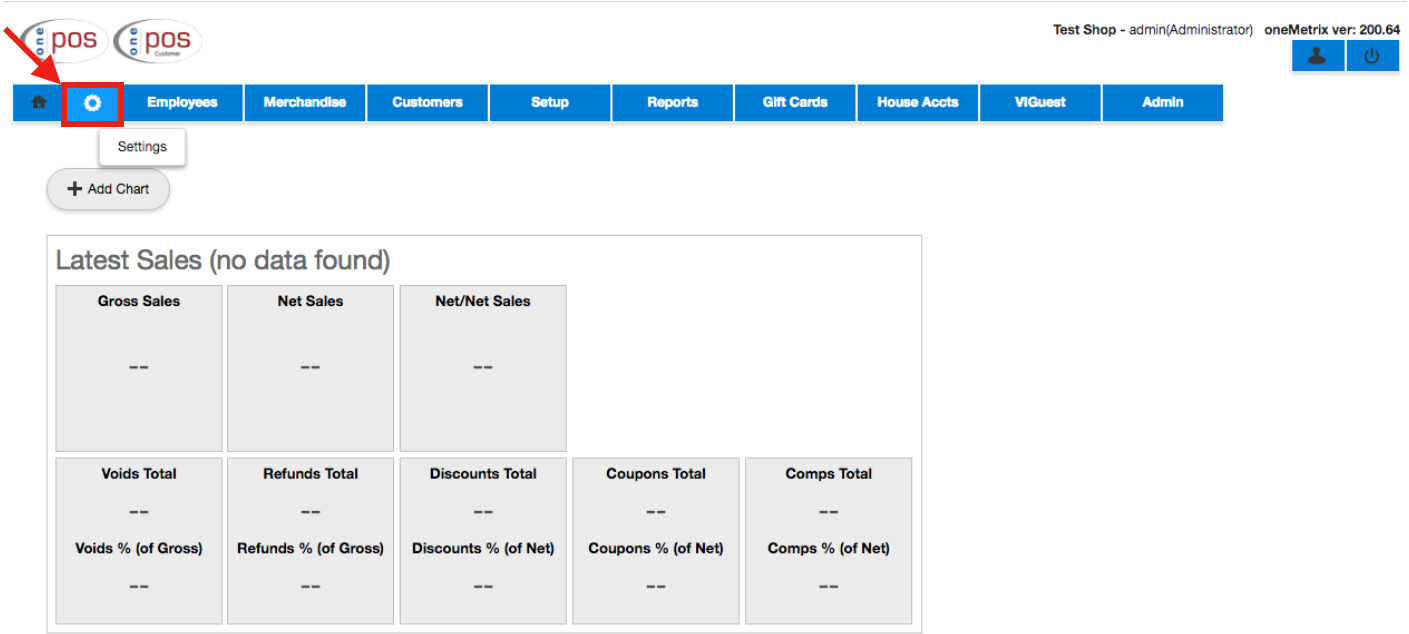
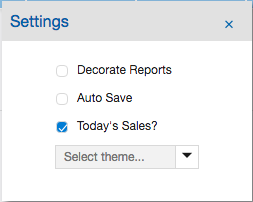
In the Settings window, you will see the following options.
Decorative Reports is currently a deprecated feature that when checked, was used to view more colorful types of reports. It is best to always un-select this option.
Auto Save is a feature that when checked, will automatically save any updates the user makes throughout navigation of oneMetrix. If unchecked when a user makes changes, a dialog will appear prompting the user if they want to make changes.
Today's Sales is also a deprecated feature that was utilized to allow the system to show yesterday's sales data rather than the most current sales. Since the latest software versions now sync the sales data real time (and not at the End of Day as in previous versions of the software), Today's Sales should always be selected.
Select theme is described in its own section below.
oneMetrix Themes
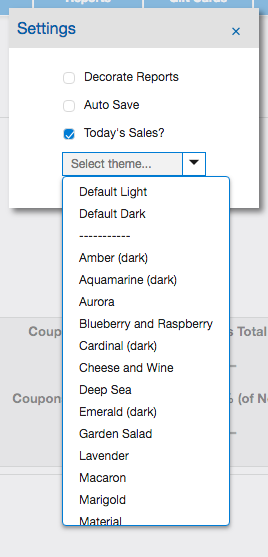
Themes provide a way for the user to set their own color scheme within a oneMetrix session. Go to Settings, click on the drop down menu, and then select your preferred theme. The color scheme descriptions for each theme are provided at the following link. Please access to obtain a color scheme for your desired needs. https://www.zkoss.org/zkthemepackdemo/
Related Articles
Unknown Exception Error In Onemetrix / Oneschedule
When entering employee schedules in onemetrix, there is an error that can appear when a date is selected to add an employee shift to. This will occur if an employee does not have a pay category assigned Verify Pay Category - Still in Onemetrix, ...How to Pull a Report in oneMetrix
Go to oneMetrix.com After you log in, navigate to the reports option on the top menu (See screenshot below) Select the report, the date range, and click generate. This will allow you to view the report with options at the top to save it as a pdf or ...oneSchedule Overview
onePOS provides an in-house employee scheduling tool that is accessible through oneMetrix. This allows users to create schedule records, enter employee availability, copy schedule data, view reports, and execute other various scheduling tasks with ...WTI Overview
WTI (Worldwide Telecommunication Inc.) Routers are the routers we use to create a dedicated network for our product to work efficiently from. They are typically set after the customer's router, the communication route being Modem -> Router -> WTI ...Color Groups Overview
Merchandise - Color Groups Color groups are used to create a more visually dynamic aesthetically pleasing method of categorizing items and can also control how items are sorted on a screen. A merchandise item will have a color group assigned to it ...